With Pre Meeting Agenda, you can prepare for a client meeting in minutes. Filenote AI pulls client information from your CRM (customer relationship management system), previously recorded meetings and any files you upload, then fills in your agenda template for you. You review and edit the draft before it is saved or sent anywhere.
Before you start
Make sure you have:
- Access to app.filenote.ai, which you log in to using your Microsoft credentials.
- The client set up in Filenote AI, or their details ready to add.
- Any extra files you want to use (for example, previous file notes) saved and ready to upload.
✓ Good to know
You don't need to connect your CRM beforehand. If it isn't connected yet, you can enter its details in Magic Studio. Filenote AI connects it automatically, and it will also show as connected in Settings / Platform Connect.
How to generate a pre-meeting agenda
| Step 1 | Select Pre Meeting Agenda in Magic Studio |
| Step 2 | Add your client |
| Step 3 | Connect to your CRM |
| Step 4 | Add supporting files and instructions |
| Step 5 | Generate your task |
| Step 6 | Review and edit the agenda |
| Step 7 | Finalise and save |
Step 1: Select Pre Meeting Agenda in Magic Studio
- Log in to app.filenote.ai using your Microsoft credentials.
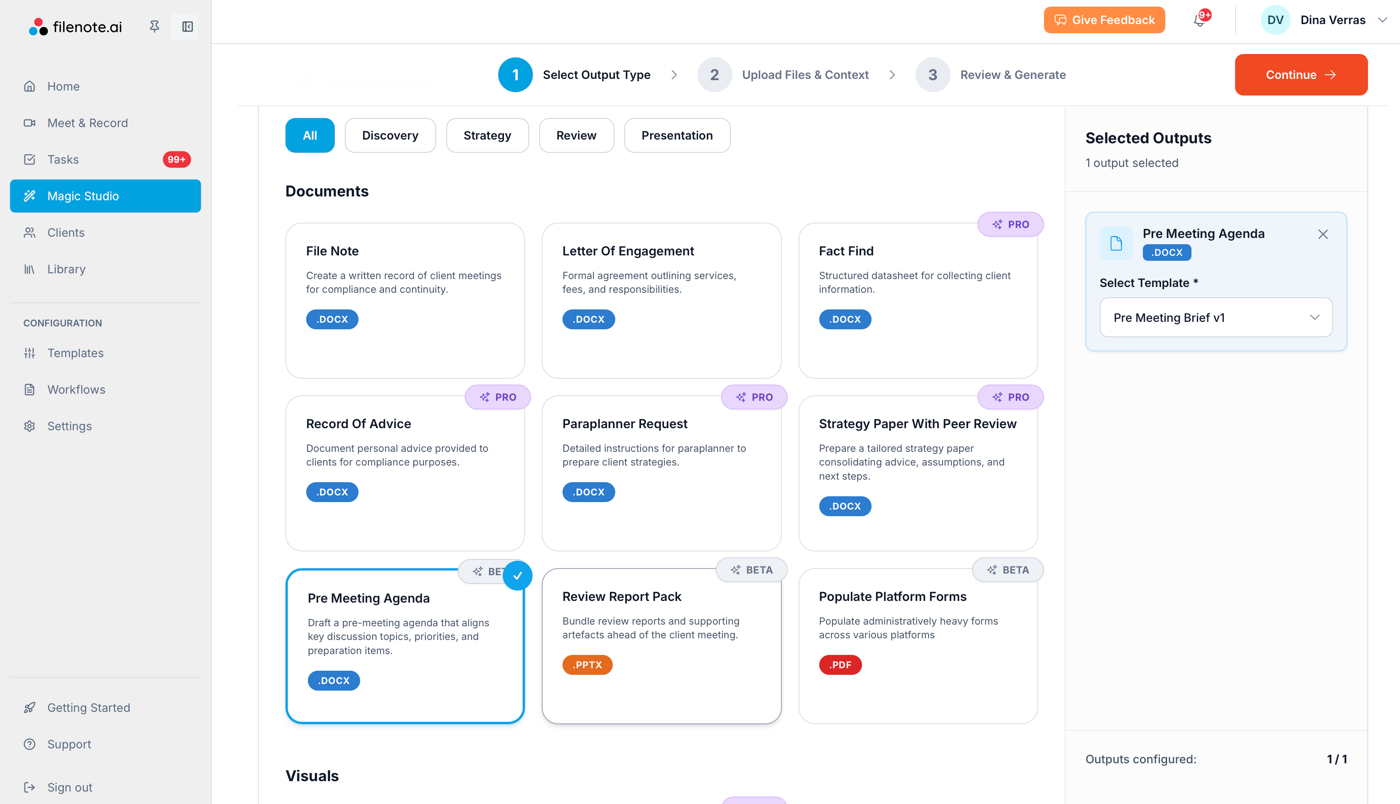
- In the left menu, click Magic Studio.
- Under Documents, select Pre Meeting Agenda.
- Click Continue.
Step 2: Add your client
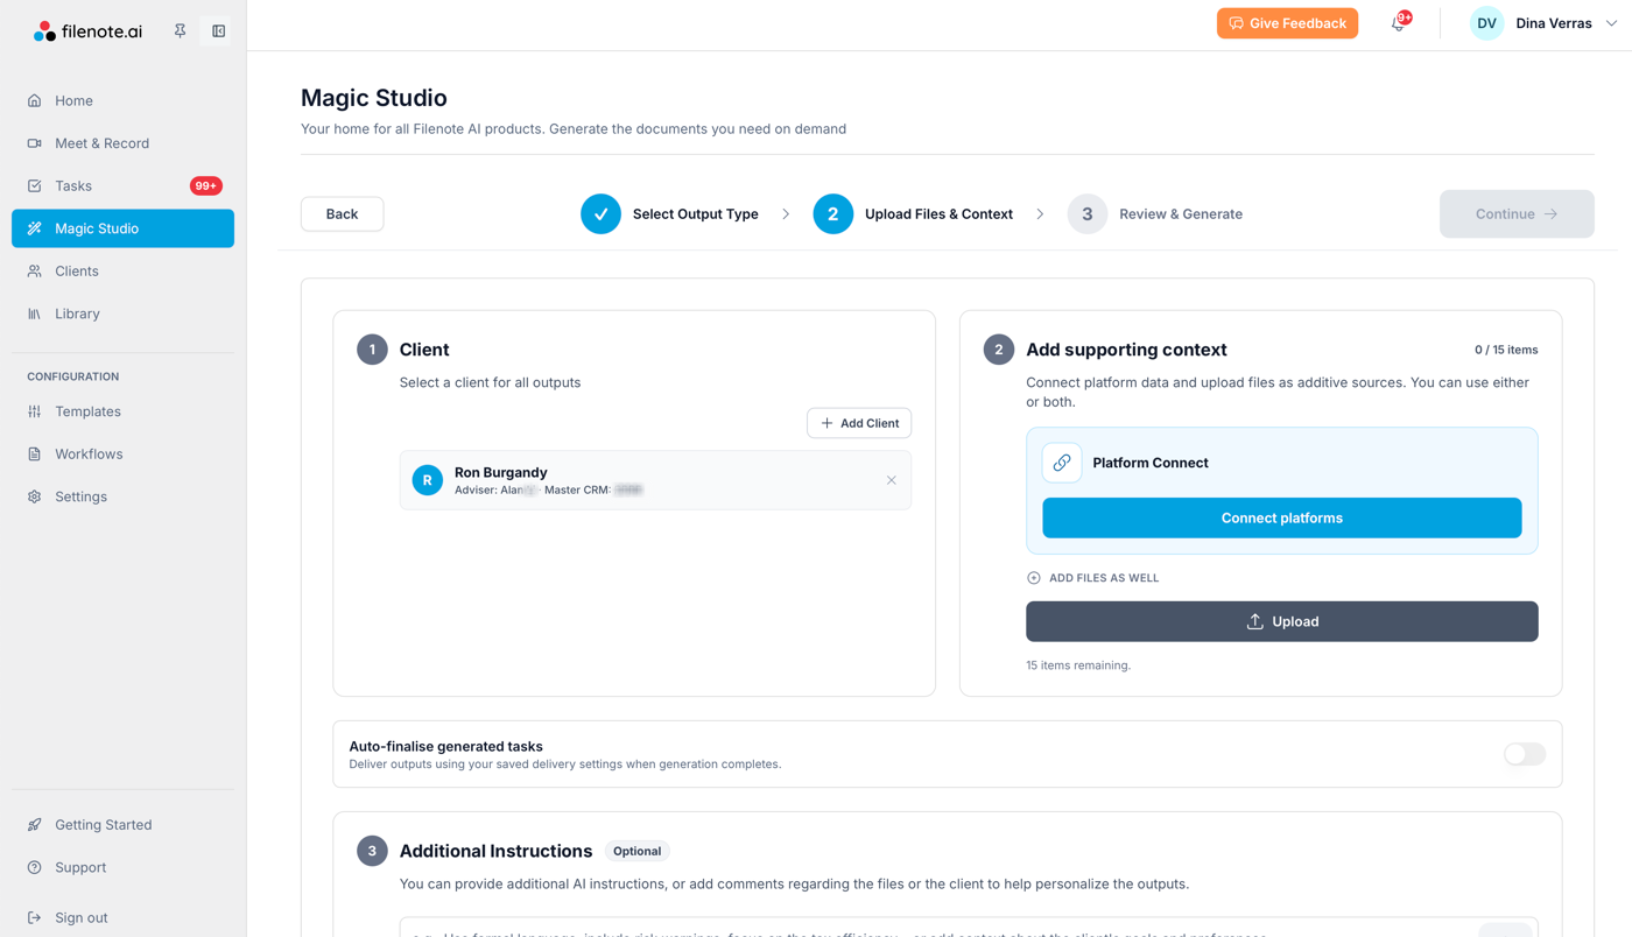
- Under Client, select the client the meeting is for.
- If they aren't listed, click Add Client to create them.
- The client card shows their adviser and Master CRM ID.
Step 3: Connect to your CRM
You can do Step 3 and Step 4, or only one of them. Use Step 3 to pull client information from your CRM, and Step 4 to add files or instructions.
- Under Add supporting context, click Connect platforms.
- Select your CRM, then click Continue.
- Tick the CRM modules you want Filenote AI to pull information from.
Step 4: Add supporting files and instructions
You can use this step on its own or together with Step 3. You can add up to 15 context items in total.
- Click Upload to add other client files, such as:
- previous file notes
- documents you want reflected in the agenda
- previously recorded meetings.
- Under Additional Instructions, tell the AI what to focus on (for example, topics to prioritise or the tone to use).
- Click Continue.
Step 5: Generate your task
- Check the summary.
- Click Generate All Outputs.
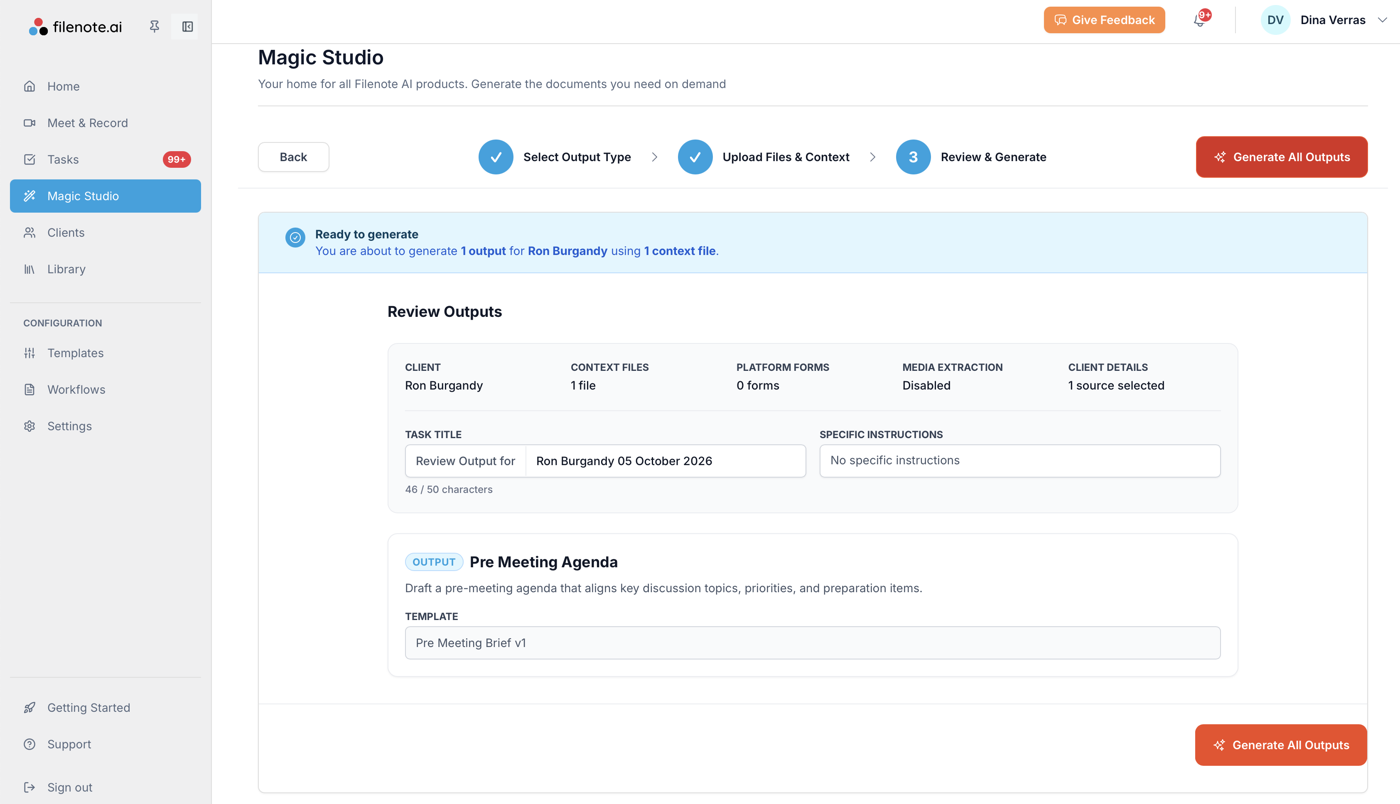
Filenote AI processes the request. When it is complete, the agenda appears as a new task in Tasks.
Step 6: Review and edit the agenda
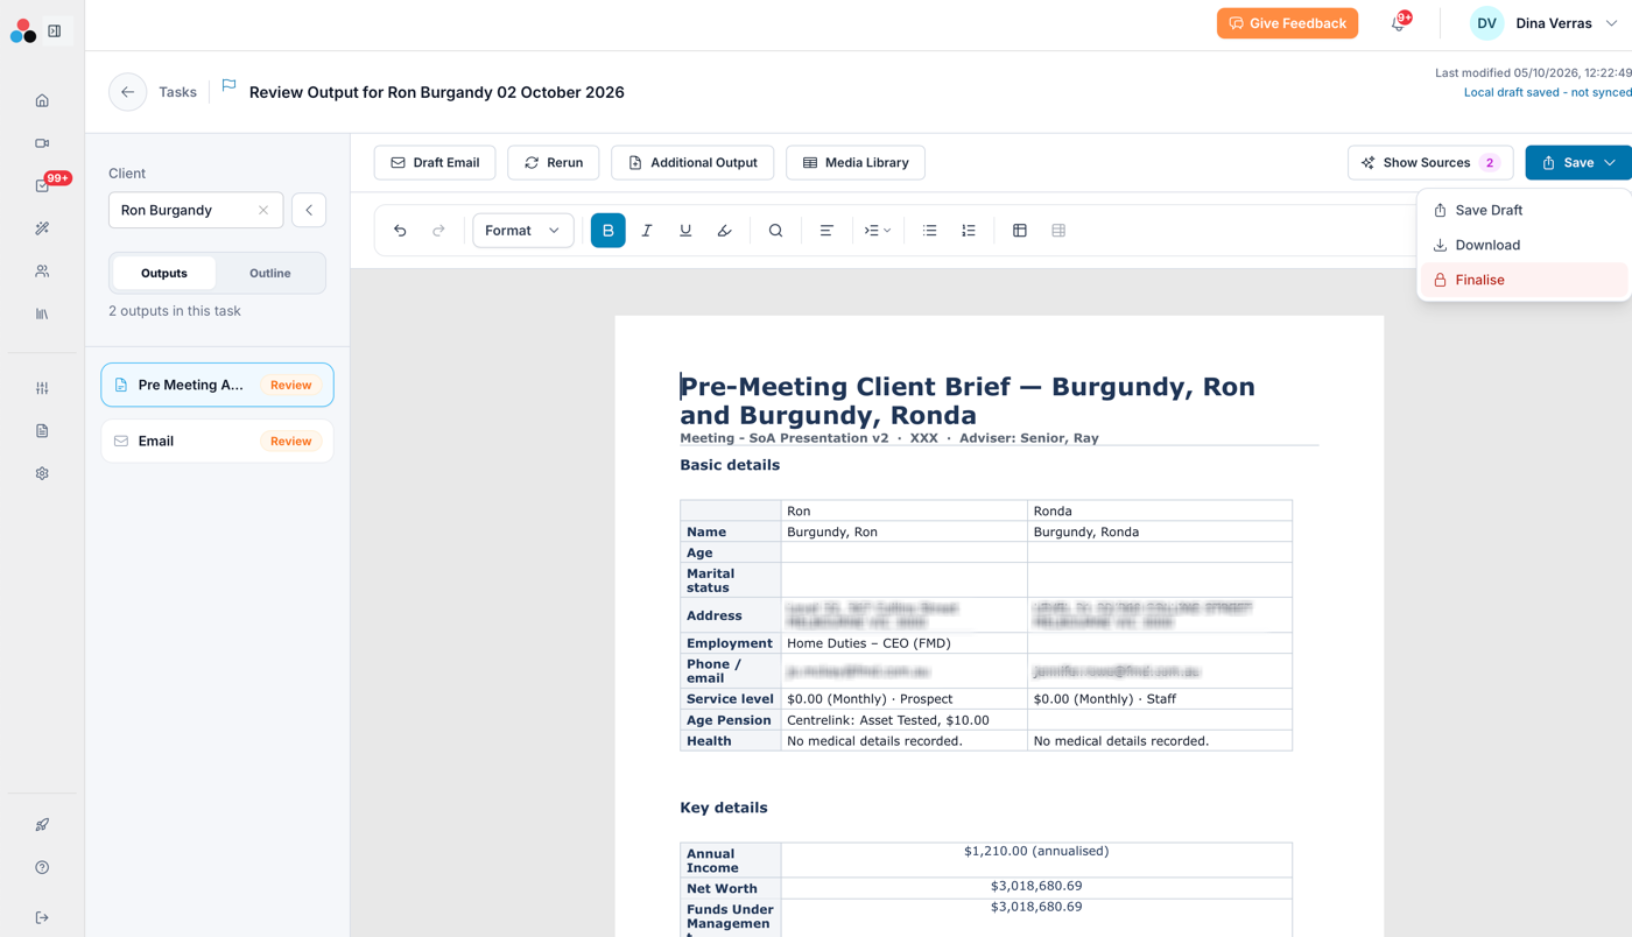
- Go to Tasks and open the new task. It opens in the AI editor, marked Review.
- Read through the agenda and edit it directly in the editor.
- Use the toolbar options if you need them:
- Show Sources: check where each detail came from.
- Draft Email: prepare a covering email.
- Rerun: regenerate the agenda with different context.
- When you're happy with it, click Save, then Finalise.
- To come back to it later, click Save Draft instead.
Step 7: Finalise and save
- In the Finalise & Save Outputwindow, tick the outputs you want to save.
- Optional: click Add feedback to help improve future drafts.
- Under Delivery Location, choose OneDrive, SharePoint, Email or CRM.
- To use a different folder, click Browse another folder.
- To keep a copy in your CRM as well, tick Also save to CRM.
- Click Finalise & save.
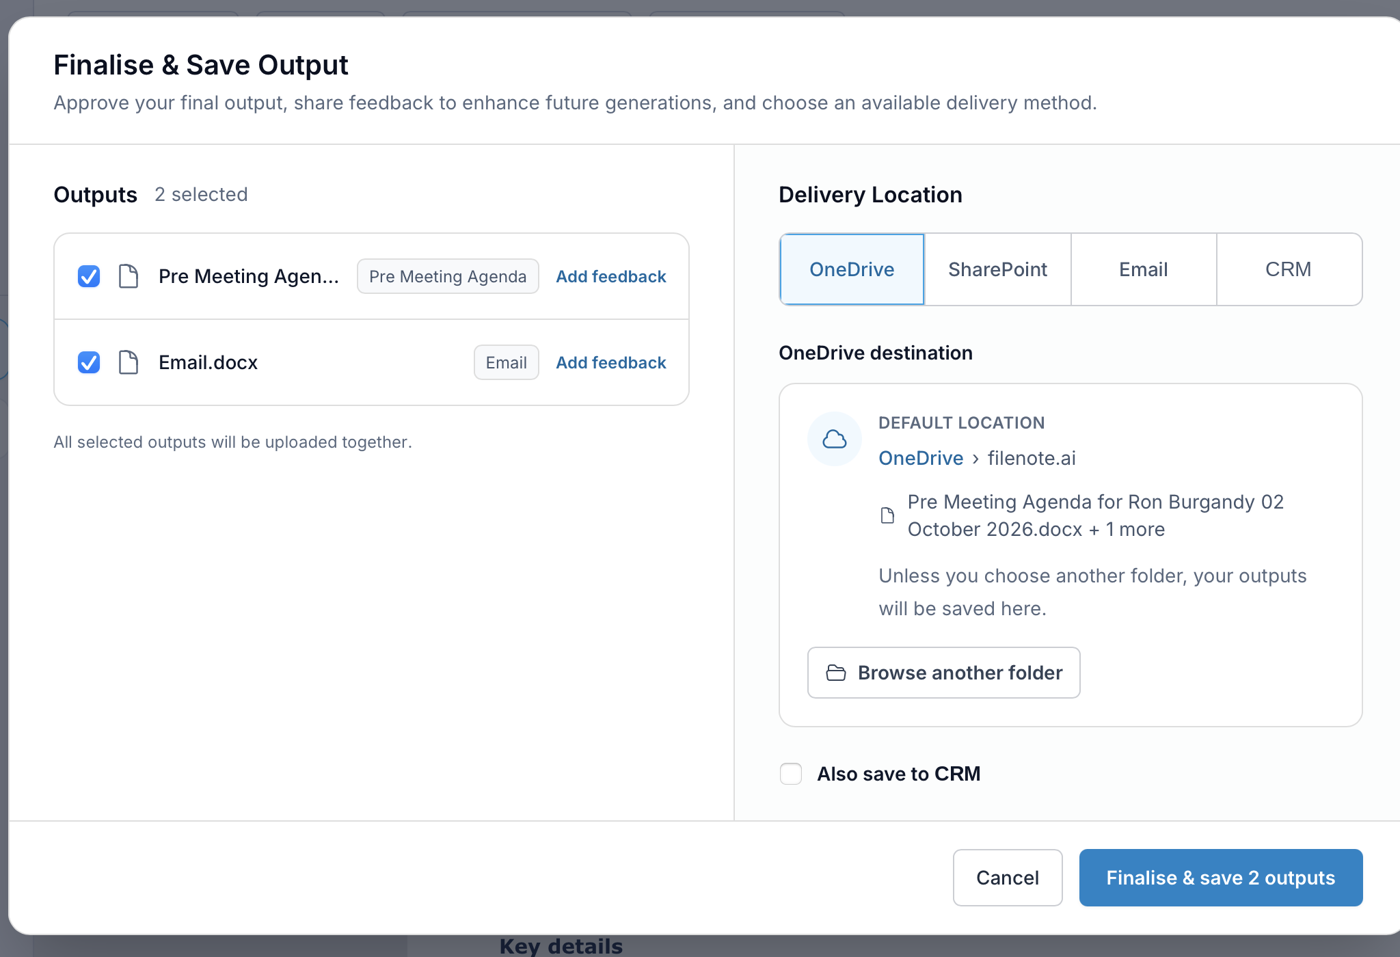
Your pre-meeting agenda is now saved and ready for your meeting.
Was this article helpful?
That’s Great!
Thank you for your feedback
Sorry! We couldn't be helpful
Thank you for your feedback
Feedback sent
We appreciate your effort and will try to fix the article