With Fact Find Update, you can take any new or updated client information and sync it back to your CRM (customer relationship management system). Filenote AI reads your client documents, recordings or notes, compares them with the client's Fact Find (their stored personal and financial details) in your CRM, and shows you every change it finds. You review and approve each change before anything is sent to your CRM.
| In this article How to update a client's Fact Find Related articles |
How to update a client's Fact Find
| Step 1 | Select Fact Find Update in Magic Studio |
| Step 2 | Add your client |
| Step 3 | Connect to your CRM |
| Step 4 | Add your client information |
| Step 5 | Generate your Task |
| Step 6 | Review the changes found |
| Step 7 | Submit the changes to your CRM |
Step 1: Select Fact Find Update in Magic Studio
Go to Magic Studio (the document generation tool inside the Filenote AI platform). Under Platform Connect, select Fact Find Update.
In the Selected Outputs panel, choose your CRM from the Select Template drop-down, then click Continue.
Step 2: Add your client
Under Client, select the client you want to update, or click Add Client. The client card shows their adviser and Master CRM ID.
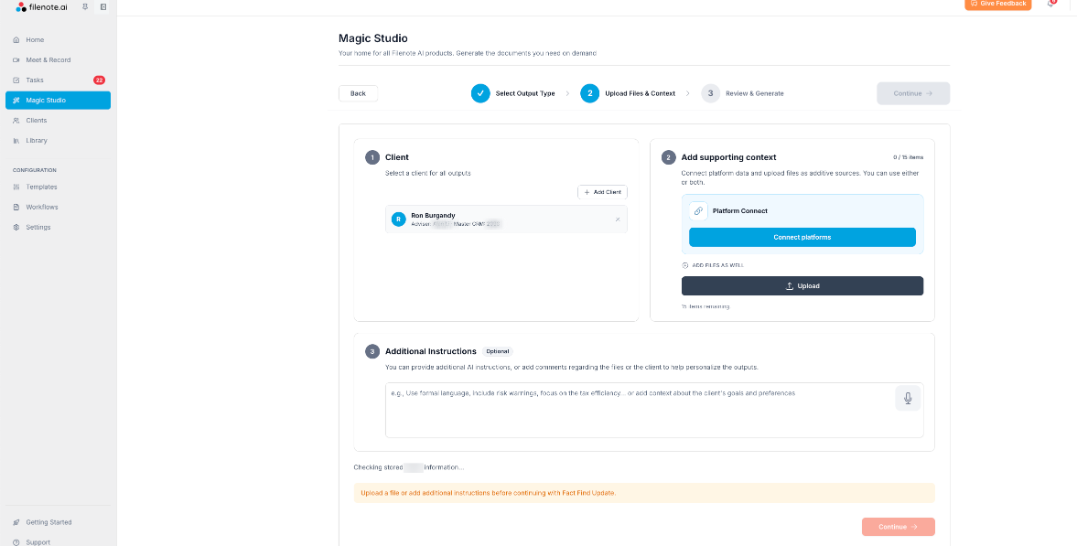
| ⚠ Important Your client must have a Master CRM ID (the client's ID in your CRM) on their profile. Fact Find Update uses it to find the right client record. If the client card doesn't show one, add it before you continue. |
To add a Master CRM ID:
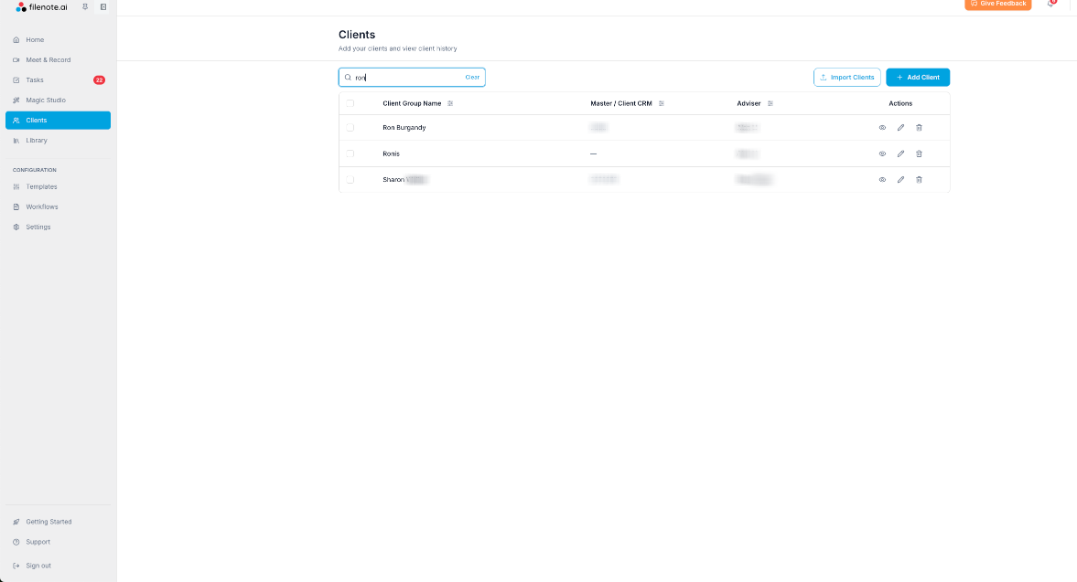
- Go to the Clients tab and search for your client (or click Add Client to create one).
- Click the edit icon (pencil) next to the client.
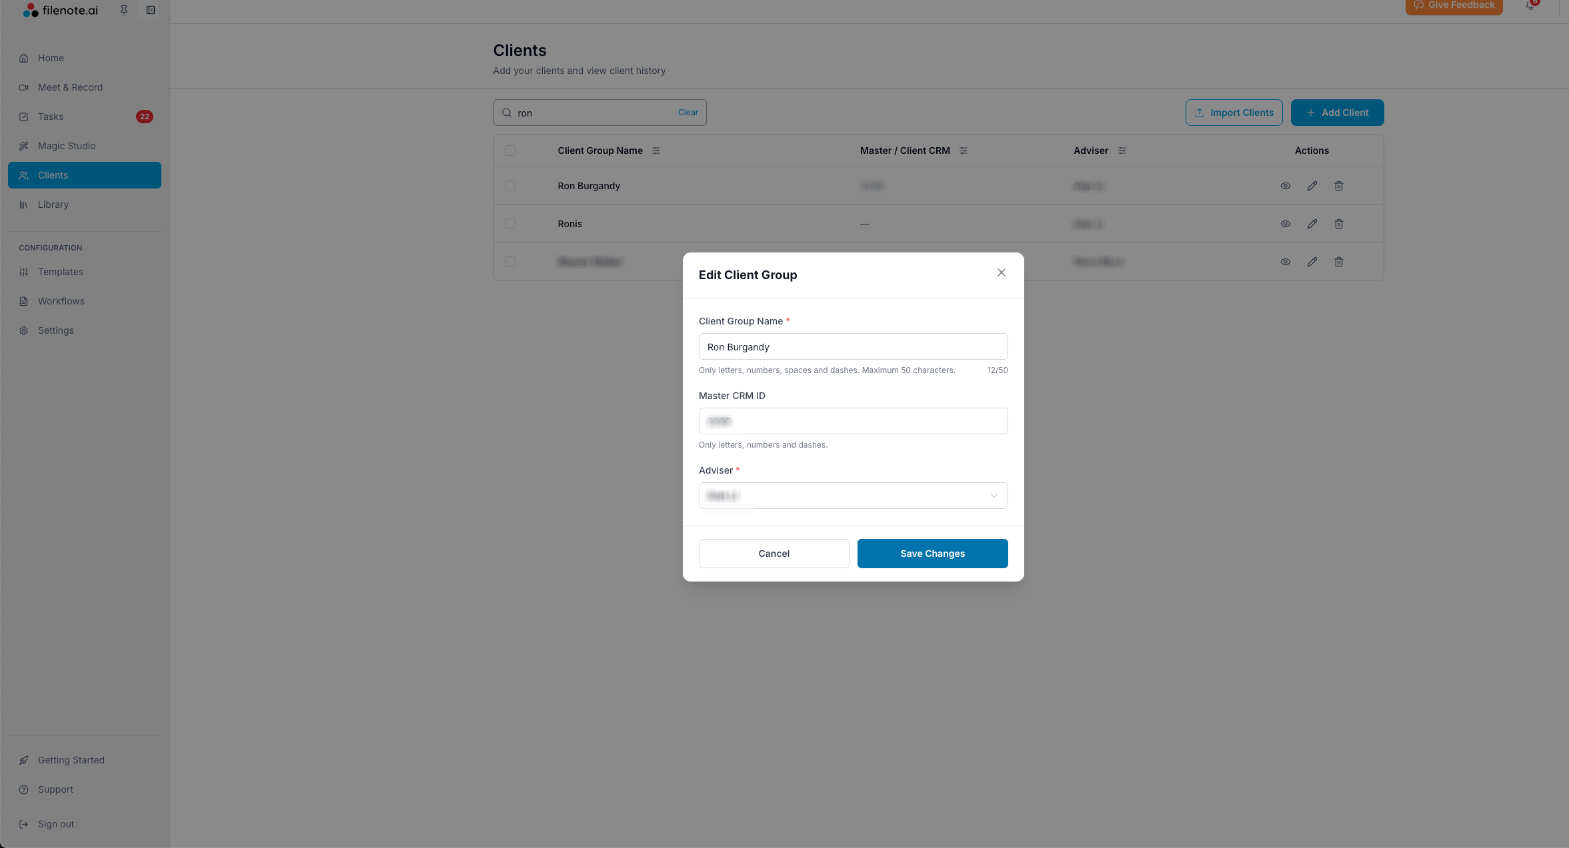
- Enter the client's CRM ID in the Master CRM ID field.
- Click Save Changes.
Step 3: Connect to your CRM
Under Add supporting context, click Connect platforms.
Populate data fields and check they're correct, click Continue and log in.
| ✓ Good to know The client's Fact Find syncs from your CRM in the background after you submit your Task, so you don't need to wait for it to load. |
Step 4: Add your client information
Give Filenote AI the information to compare against the client's Fact Find. You can use either option, or both:
- Upload client documents or a meeting recording (up to 15 items).
- Type any client changes directly into Additional Instructions.
You'll need to upload at least one file or add instructions before you can continue.
| ? Tip Additional Instructions is a quick way to capture changes your client mentions by phone or email. For example: "Client has a new mobile number: 0400 000 000." |
Step 5: Generate your Task
Click Continue, check the details on the Review & Generate screen, then click Generate.
Filenote AI creates a new Task tagged to that client, which you'll find in Tasks. To learn more, see Understanding Tasks.
Step 6: Review the changes found
Open the Task. The Review changes screen compares your information with the client's Fact Find stored in your CRM, and shows how many changes were found and how many need your review.
- Check each entity. Each person or entity linked to the client (such as a partner or family trust) is listed across the top, with the number of changes found. Click an entity to see its changes.
- Accept or reject each change. For each field, compare the current value in your CRM with the Update to value. You can edit the Update to value before you accept it.
- Find and add other information. Use the search box or click All fields to find any other field you want to update.
- When you're done, click Continue to submit.
| ★ Why this matters Every suggested change shows where it came from. Click From your input under a field to see the text Filenote AI used, so you can check it before you accept. Nothing is sent to your CRM until you approve it. |
| ⚠ Don't forget Items marked Complete the details or reject are missing a required field. Fill it in and accept, or reject the item. You can't continue until every flagged item has a decision. Click Review required fields at the bottom of the screen to jump straight to them. |
Step 7: Submit the changes to your CRM
The Submit screen lists every change you've selected, grouped by client or entity. For each change, you'll see the current value in your CRM, the new value, the source document, and whether it's an updated or new value.
- Review the changes. To make a correction, click Edit or Back to review.
- When you're happy, click Connect.
- Submit your changes.
| ✓ Good to know Your selected changes are validated before they're applied to your CRM. Your submission is recorded on the Task, and you can choose to mark the Task as complete afterwards. |
Related articles
| Need help? If you run into any issues or have questions, our support team is here to help. Email Support → |
Was this article helpful?
That’s Great!
Thank you for your feedback
Sorry! We couldn't be helpful
Thank you for your feedback
Feedback sent
We appreciate your effort and will try to fix the article