Configuring Output Saving Locations (OneDrive & SharePoint)
This guide explains how to configure where your Filenote AI completed outputs are saved when you finalise a Task.
You can choose to automatically route your files to OneDrive or SharePoint, and set up custom folders and file naming conventions to keep everything perfectly organised for your practice.
These settings are found in: Settings / Delivery Settings
| Location 1 | Option 1: OneDrive File Saving Configuration |
| Location 2 | Option 2: SharePoint File Saving Configuration |
Option 1: OneDrive File Saving Configuration
Step 1 — Configure Default Location
Firstly, you need to set your default save destination - click the Configure location button in the OneDrive settings section. You will be prompted to paste and validate the link to your desired OneDrive folder.
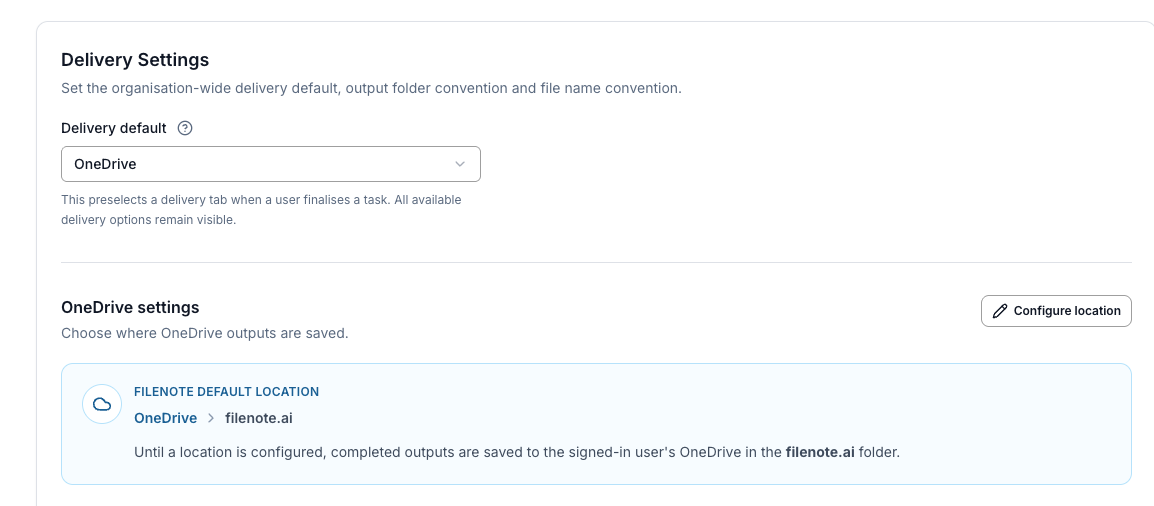
You can always change the location later, using the Change location button.
Step 2 — Create Subfolders (Optional)
If you want to keep your files organised into subfolders automatically, you can set this up in the Output subfolders section.
First, click Add subfolder
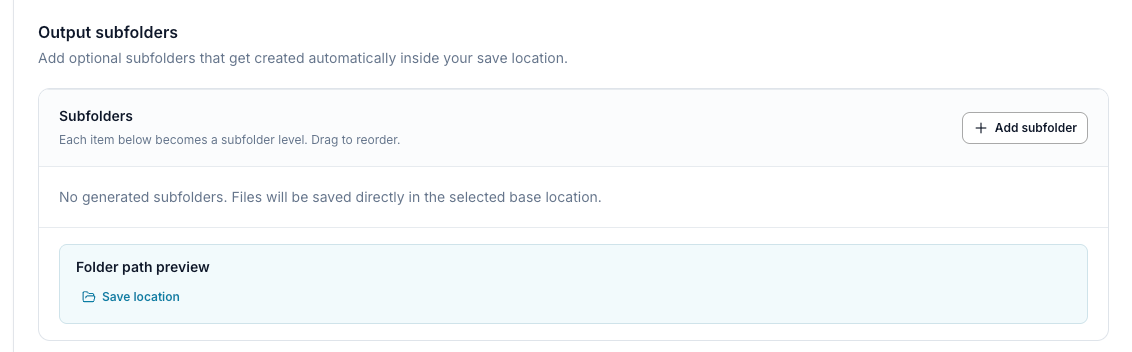
Next, define naming convention for your folder.
| ? Flexible Folder Naming You can name your folder using any combination of standard parts (such as Client Name or Date). If you use more than one part, you can choose a divider (a hyphen, underscore, or space) to separate the words. |
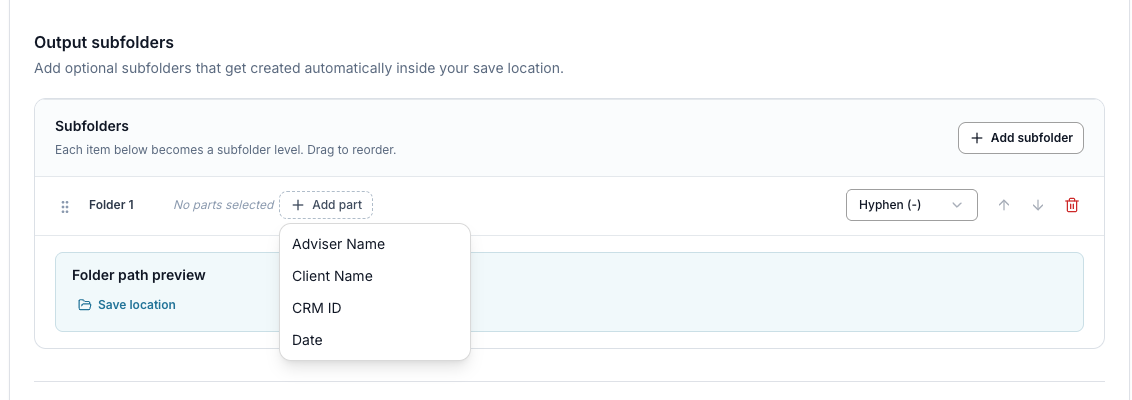
Step 3 — Name Your Output File
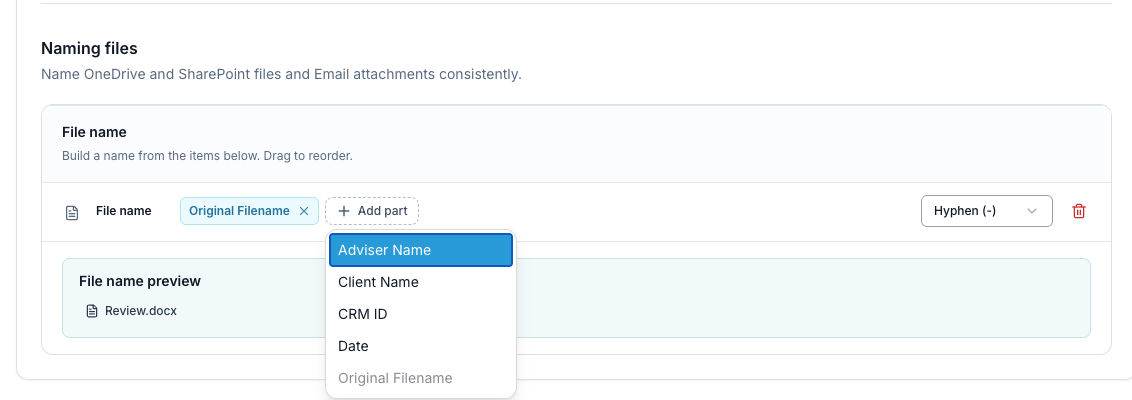
You can ensure your files follow a consistent naming convention in the Naming files section. Build your ideal file name by adding parts to the original file name, including: Adviser Name, Client Name, CRM ID and Date.
Just like folders, you can choose the divider between words (hyphen, underscore, or space) to keep formatting clean.
Option 2: SharePoint File Saving Configuration
Step 1 — Configure Default Location
In the SharePoint settings section, click to Add location or edit an existing one. Paste the link to your destination SharePoint folder and validate the location so Filenote AI knows exactly where to send your documents.
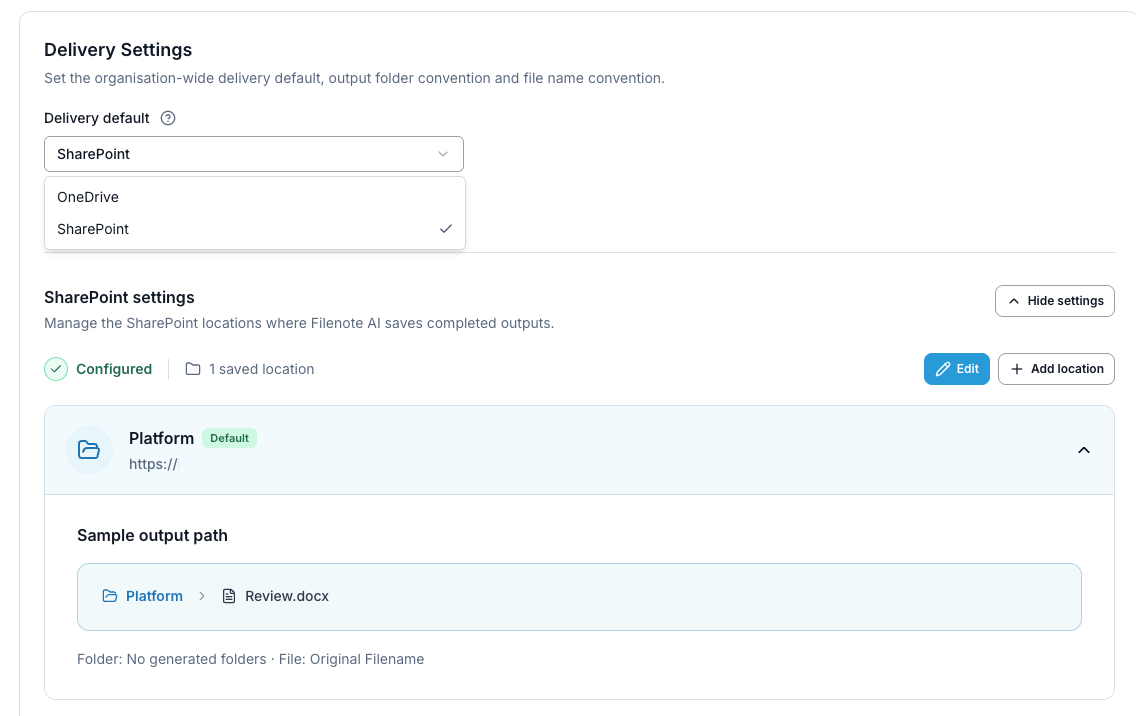
Step 2 — Create Subfolders (Optional)
Similarly to OneDrive, you can create optional subfolders in your selected SharePoint location. Use combinations of Client Name, CRM ID, Adviser Name, and Date.
| ✓ Good to Know If you combine multiple parts, you have full control over the divider (hyphen, underscore, or space) to match your practice's exact filing standards. |
Step 3 — Name Your Output File
Lastly, set up your document naming convention by modifying the Naming files section. Build the file name using the original file name as a base, and add dynamic parts like Date or Client Name as required.
| Need help? If you run into any issues or have questions, our support team is here to help. Email Support → |
Was this article helpful?
That’s Great!
Thank you for your feedback
Sorry! We couldn't be helpful
Thank you for your feedback
Feedback sent
We appreciate your effort and will try to fix the article