How to Add Support Staff for Meetings and Tasks
This guide explains how to add support staff to your account. By assigning team members, you can allow them to run and organise recorded meetings on your behalf, as well as view and action your platform tasks.
| Step 1 | Navigate to User Permissions |
| Step 2 | Assign an Additional Meeting Organiser |
| Step 3 | Grant Full Task Visibility |
Step 1 — Navigate to User Permissions
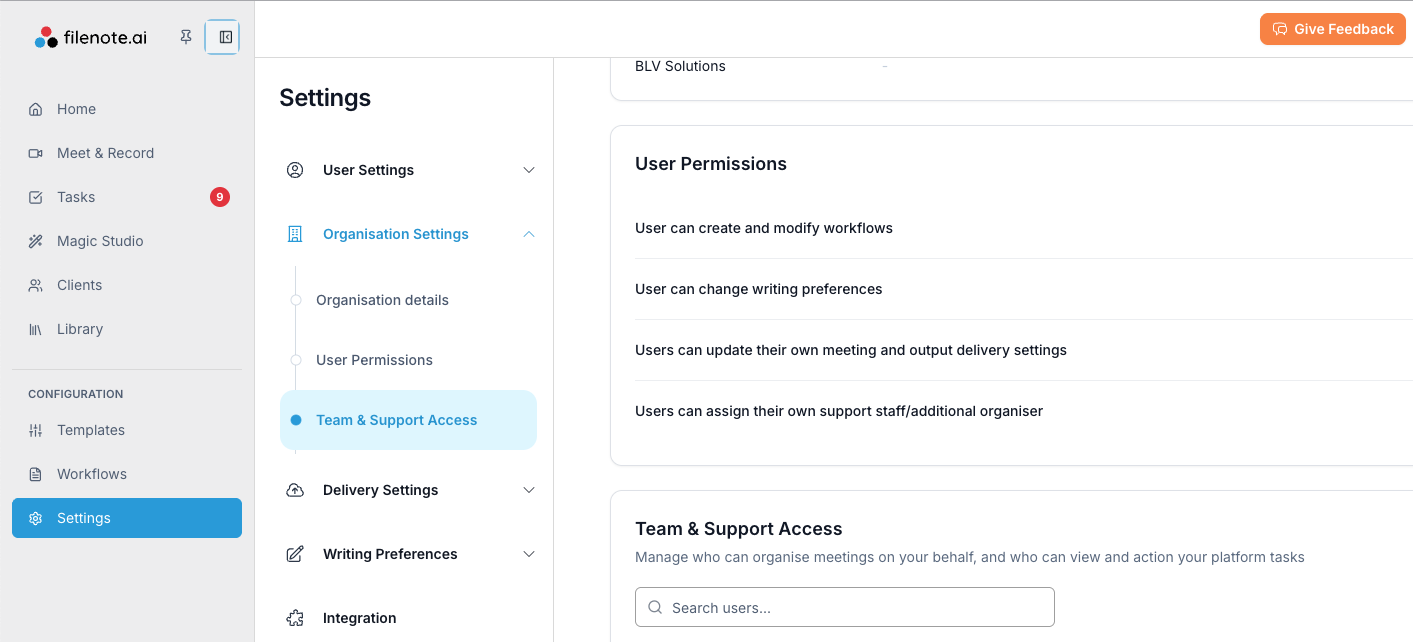
To manage your team's access, log in to your account and navigate to the permissions area.
- Click on Settings in the left-hand menu.
- Select User Permissions.
- Scroll down to the Team & Support Access section.
| ✓ Organisation Settings Ensure the toggle for "Users can assign their own support staff/additional organiser" at the top of the page is switched ON. |
Step 2 — Assign an Additional Meeting Organiser
Adding a user here allows them to schedule a Teams or Zoom call on your behalf. Filenote AI will automatically generate your file notes and outputs for those specific meetings.
To assign an organiser, click the + button under the Additional Meeting Organiser column next to your name and select their email address from the drop-down list and click 'save'.
| ? Missing Someone? If a user is not shown in the drop-down list, they need to be added as a new user (Paid or Support) in the Users & Billing section within Settings. They must also complete their platform onboarding before they will appear here. Note that only Paid users can add new users to the platform. |
| ⚠ Important: Meeting Invitations When your support staff books a meeting on your behalf, they must invite you (the Licensed User) to the meeting as an attendee. This is required for the software to recognize a paid user is present and successfully generate your AI notes. |
Step 3 — Grant Full Task Visibility
Adding a user to this column enables that support staff member to see all of your tasks and action any of them on your behalf. This is perfect for paraplanners or administrative assistants who help manage your workflow.
To grant access, simply click the + button under the Full task visibility column next to your name and select the relevant user and save. Once granted, the user will be able to see your Tasks, and will have the ability to action them.
| Need help? If you run into any issues or have questions, our support team is here to help. Email Support → |
Was this article helpful?
That’s Great!
Thank you for your feedback
Sorry! We couldn't be helpful
Thank you for your feedback
Feedback sent
We appreciate your effort and will try to fix the article