Save outputs to any of: Email,OneDrive, SharePoint of CRM
This guide explains how to configure where your Filenote AI completed outputs are saved when you finalise a Task.
You can choose to have your outputs sent to you by Email, or automatically route your files to OneDrive or SharePoint and set up custom folders and file naming conventions to keep everything perfectly organised for your practice. You can also save your outputs directly to the client's record in your CRM, either alongside one of these methods or on its own.
These settings are found in: Settings / Delivery Settings. Start by choosing your delivery method from the Delivery default drop-down. Saving to your CRM is chosen when you finalise a Task (see Option 4).
| Location 1 | Option 1: OneDrive File Saving Configuration |
| Location 2 | Option 2: SharePoint File Saving Configuration |
| Location 3 | Option 3: Email Delivery |
| Location 4 | Option 4: Save Directly to Your CRM |
Option 1: OneDrive File Saving Configuration
Step 1: Configure Default Location
Firstly, you need to set your default save destination: click the Configure location button in the OneDrive settings section. You will be prompted to paste and validate the link to your desired OneDrive folder.
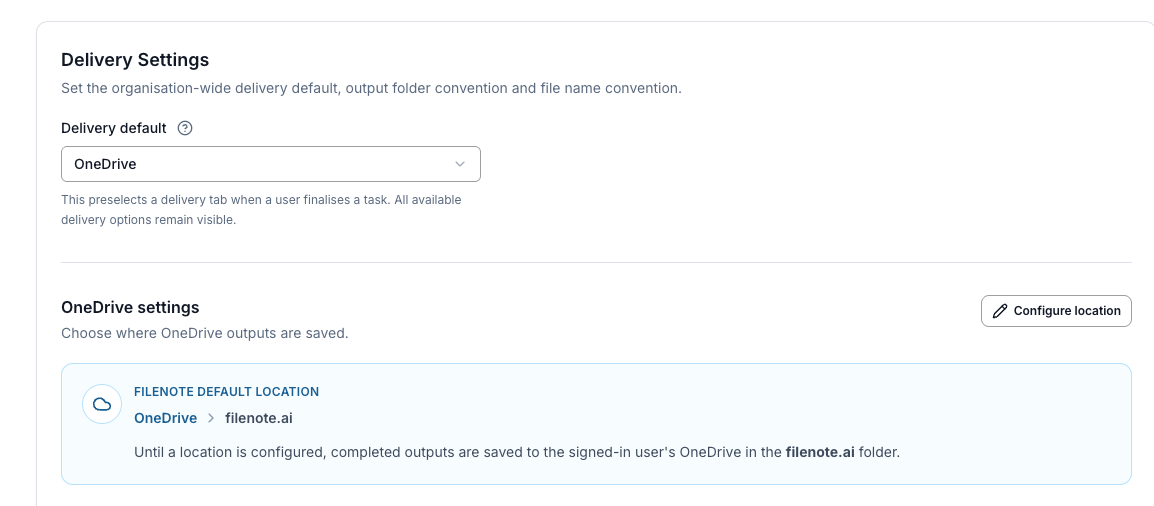
You can always change the location later, using the Change location button.
Step 2: Create Subfolders (Optional)
If you want to keep your files organised into subfolders automatically, you can set this up in the Output subfolders section.
First, click Add subfolder
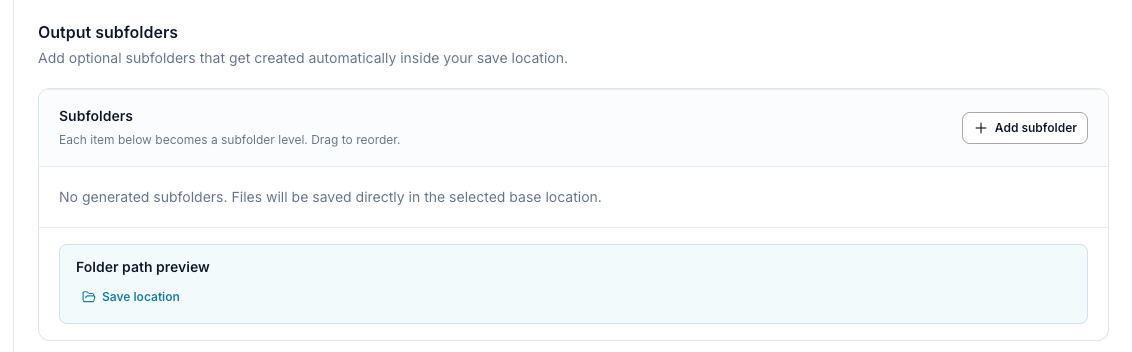
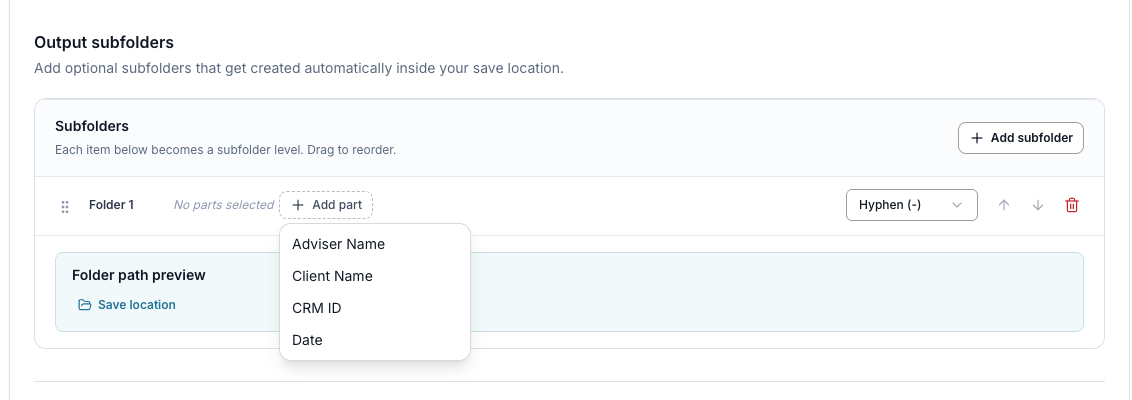
Next, define naming convention for your folder.
| ✓ Did You Know? You can name your folder using any combination of standard parts (such as Client Name or Date). If you use more than one part, you can choose a divider (a hyphen, underscore, or space) to separate the words. |
Step 3: Name Your Output File
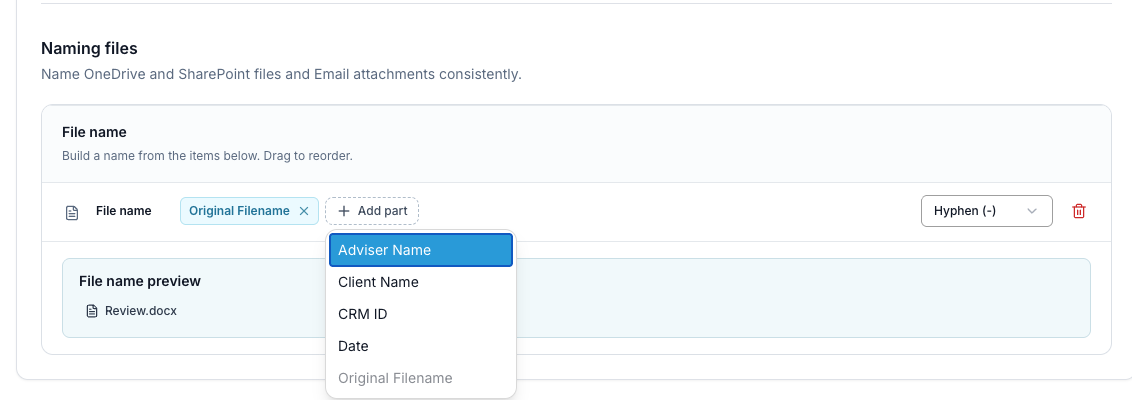
You can ensure your files follow a consistent naming convention in the Naming files section. Build your ideal file name by adding parts to the original file name, including: Adviser Name, Client Name, CRM ID and Date.
Just like folders, you can choose the divider between words (hyphen, underscore, or space) to keep formatting clean.
Option 2: SharePoint File Saving Configuration
Step 1: Configure Default Location
In the SharePoint settings section, click to Add location or edit an existing one. Paste the link to your destination SharePoint folder and validate the location so Filenote AI knows exactly where to send your documents.
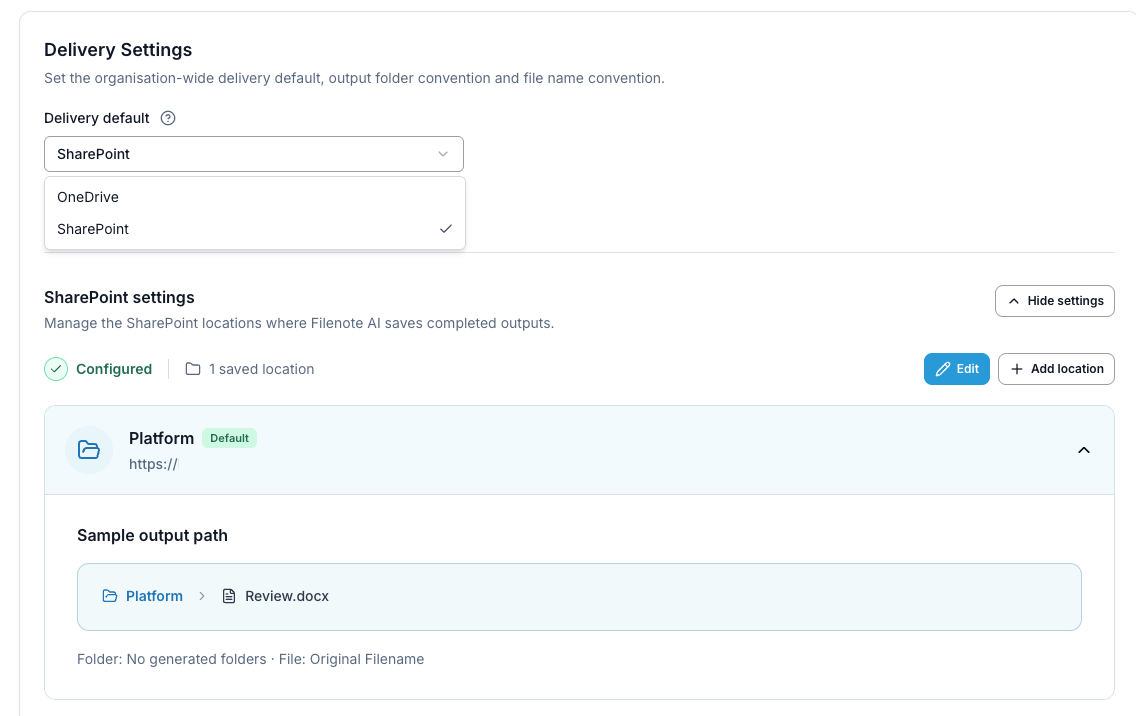
Step 2: Create Subfolders (Optional)
Similarly to OneDrive, you can create optional subfolders in your selected SharePoint location. Use combinations of Client Name, CRM ID, Adviser Name, and Date.
| ✓ Good to Know If you combine multiple parts, you have full control over the divider (hyphen, underscore, or space) to match your practice's exact filing standards. |
Step 3: Name Your Output File
Lastly, set up your document naming convention by modifying the Naming files section. Build the file name using the original file name as a base, and add dynamic parts like Date or Client Name as required.
Option 3: Email Delivery
With Email delivery, all of your outputs are sent to you by email, with each output attached. There's no folder to set up.
Step 1: Select Email as Your Delivery Default
In Settings / Delivery Settings, open the Delivery default drop-down and select Email.
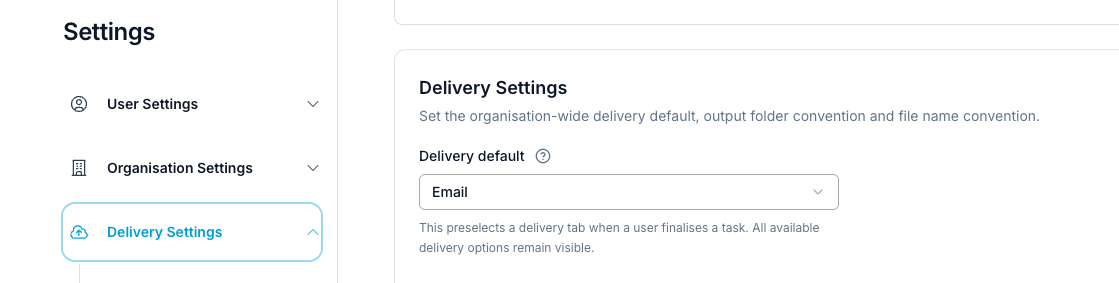
Step 2: Choose When Your Outputs Are Sent (Optional)
By default, your outputs are emailed to you when you finalise the Task in the platform. If you'd rather receive them as soon as they're generated, without reviewing them in the platform first, turn on auto-finalisation.
- Go to Settings / Delivery Settings / Auto Task Finalisation and Deletion.
- Turn on Auto-finalise generated tasks.
- To have documents created in Magic Studio emailed straight away too, turn on Auto-finalise Magic Studio tasks.
For full instructions, see Auto-finalise your Filenote AI output.
| ✓ Good to Know Once your outputs are emailed, the Task is marked as complete in the platform. If you need to make changes, you can unfinalise the Task from Completed Tasks and edit it in the platform. See How to Re-run or Add Output on a Finalised Task. |
| ? Email delivery or email notifications? Email delivery sends you your finished outputs as attachments. Email notifications are separate confirmation emails letting you know a Task is ready in the platform. See Managing your email notifications. |
Option 4: Save Directly to Your CRM
When you finalise a Task, you can save your outputs straight to the client's record in your CRM. There are two ways to do this:
- Alongside another delivery method: save to OneDrive, SharePoint or Email, and also save to your CRM, in one step.
- CRM only: send your outputs to your CRM without saving them anywhere else.
Step 1: Add the Client's CRM ID
Filenote AI uses the client's CRM ID to match your outputs to the correct client record in your CRM. Before you finalise, make sure the CRM ID has been added to the client's profile in Filenote AI.
| ! CRM ID required If the client doesn't have a CRM ID, your outputs can't be sent to your CRM and you'll see a message in the finalise window. You can enter the ID there and click Save CRM ID. This saves it to the client's profile, so you only need to do it once for each client. |
Step 2: Open the Finalise Window
In your Task, click the arrow on the Save button and select Finalise. The Finalise & Save Output window opens.
Under Outputs, tick each output you want to save. You can also click Add feedback next to an output to help improve future generations.
Step 3: Choose How to Save
To save to your CRM alongside OneDrive, SharePoint or Email:
- Under Delivery Location, select OneDrive, SharePoint or Email.
- Tick the Also save to checkbox for your CRM.
- Check that the CRM login URL is correct.
- Click Finalise & save.
To save to your CRM only:
- Under Delivery Location, select your CRM's tab.
- Check that the CRM login URL is correct.
- Click Finalise & send.
| ✓ Good to Know Your CRM login URL is filled in for you. If you change it in the finalise window, the change applies to that Task only. All selected outputs are uploaded to your CRM together. |
Related articles
- Auto-finalise your Filenote AI output
- How to Re-run or Add Output on a Finalised Task in Filenote AI
- How to set up SharePoint for your delivery method
- Understanding Tasks
| Need help? If you run into any issues or have questions, our support team is here to help. Email Support → |
Was this article helpful?
That’s Great!
Thank you for your feedback
Sorry! We couldn't be helpful
Thank you for your feedback
Feedback sent
We appreciate your effort and will try to fix the article