Before generating your first file note, make sure your IT setup is complete (if you haven't done this yet, please complete the How to Connect to the Filenote AI Platform steps first).
Once connected, generating your output is as simple as recording your meeting. Filenote AI works quietly in the background to pick up the recording and automatically create your required file note.
Below is everything you need to know to get started with our primary recording methods.
| Method 1 | Option 1: Microsoft Teams |
| Method 2 | Option 2: Zoom |
| Method 3 | Option 3: Filenote AI iPhone App |
Option 1: Record on Microsoft Teams (Virtual or In-Person)
Step 1 — Open your Teams meeting
Launch your scheduled meeting in Microsoft Teams.
Step 2 — Click More
Click More (the 3 dots at the top of the screen).
Step 3 — Start recording
Select Record and transcribe and then click Start recording.
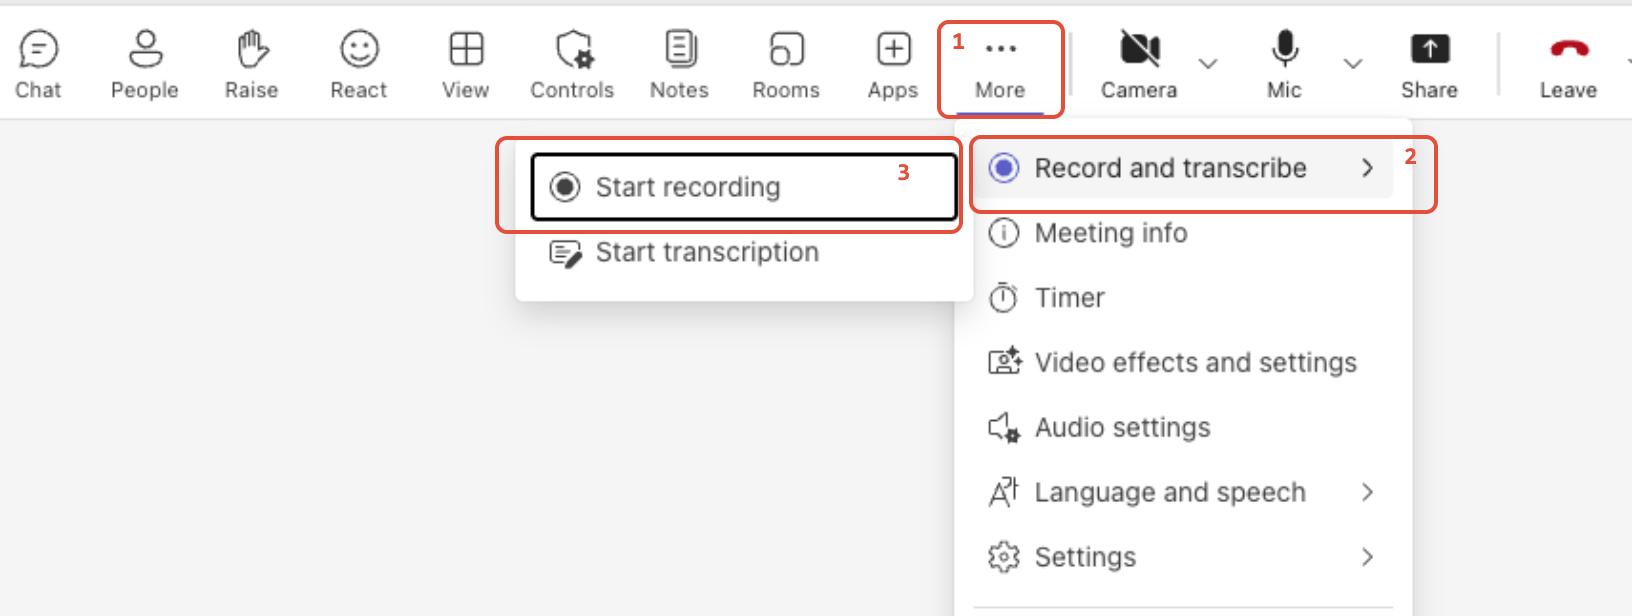
Step 4 — Conduct your meeting
Conduct your meeting as normal. Once the meeting is completed, we will automatically pick up the recording. Your finished output will be delivered directly via email (or as determined by your custom Delivery Settings).
Step 5 — Edit and Finalise your Output
After you upload, your output will appear as a new task in the Task section on the web platform.
To find your Task:
- Log into platform: app.filenote.ai
- Go to Tasks, find your new task
- Open task, and edit your documents
- When complete, you can:
- Save: saves to our platform
- Download: downloads document
- Finalise: saves to your OneDrive or Sharepoint and marks Task as complete
Option 2: Record on Zoom
Step 1 — Start your Zoom meeting
Launch your scheduled Zoom meeting.
Step 2 — Record
Click Record on the bottom toolbar and select 'Record to the Cloud'

Step 3 — Conduct your meeting
When the meeting ends, we automatically process the recording and generate the output, which will also be delivered directly to your email.
Step 4 — Review & Edit your Output
After you upload, your output will appear as a new task in the Task section on the web platform.
To find your Task:
- Log into platform: app.filenote.ai
- Go to Tasks, find your new task
- Open task, and edit your documents
- When complete, you can:
- Save: saves to our platform
- Download: downloads document
- Finalise: saves to your OneDrive or Sharepoint and marks Task as compl
| ⚠ Important Pro-Tip for Teams and Zoom For automated Teams and Zoom meetings, the system determines the output template based on a keyword in your meeting name. By default, the system will categorize meetings as a Review Meeting. [Link: Learn more about setting up and using keywords in your meeting names here] |
Option 3: Filenote AI iPhone App (In-Person Meetings)
Step 1 — Open the app
Open the app and tap to record your in-person meeting.
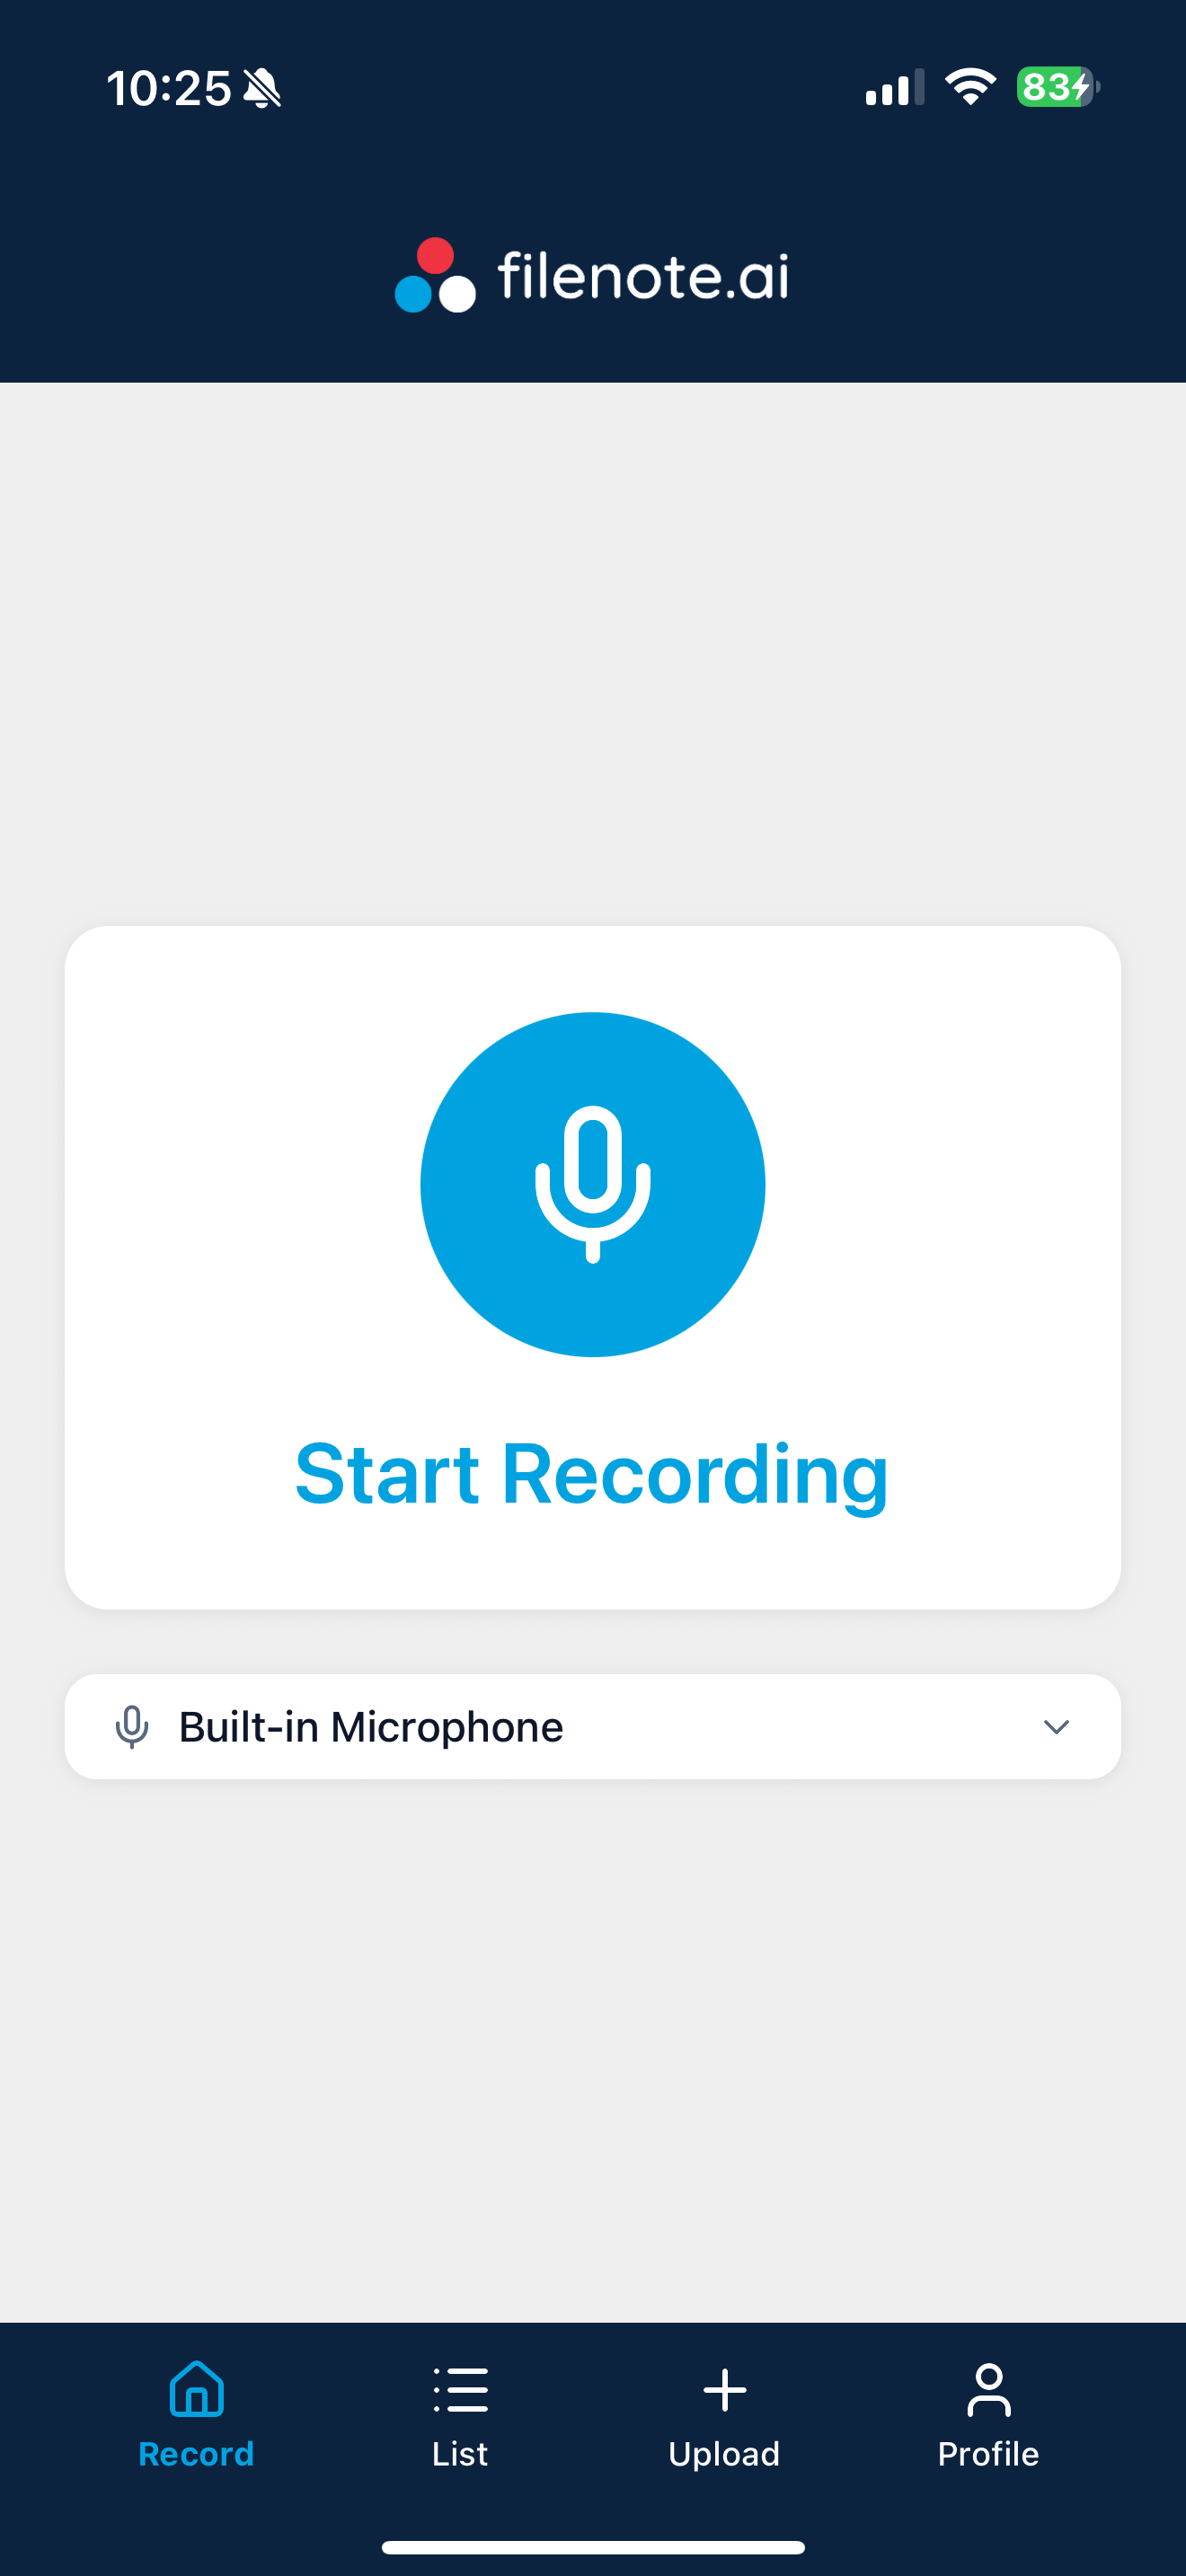
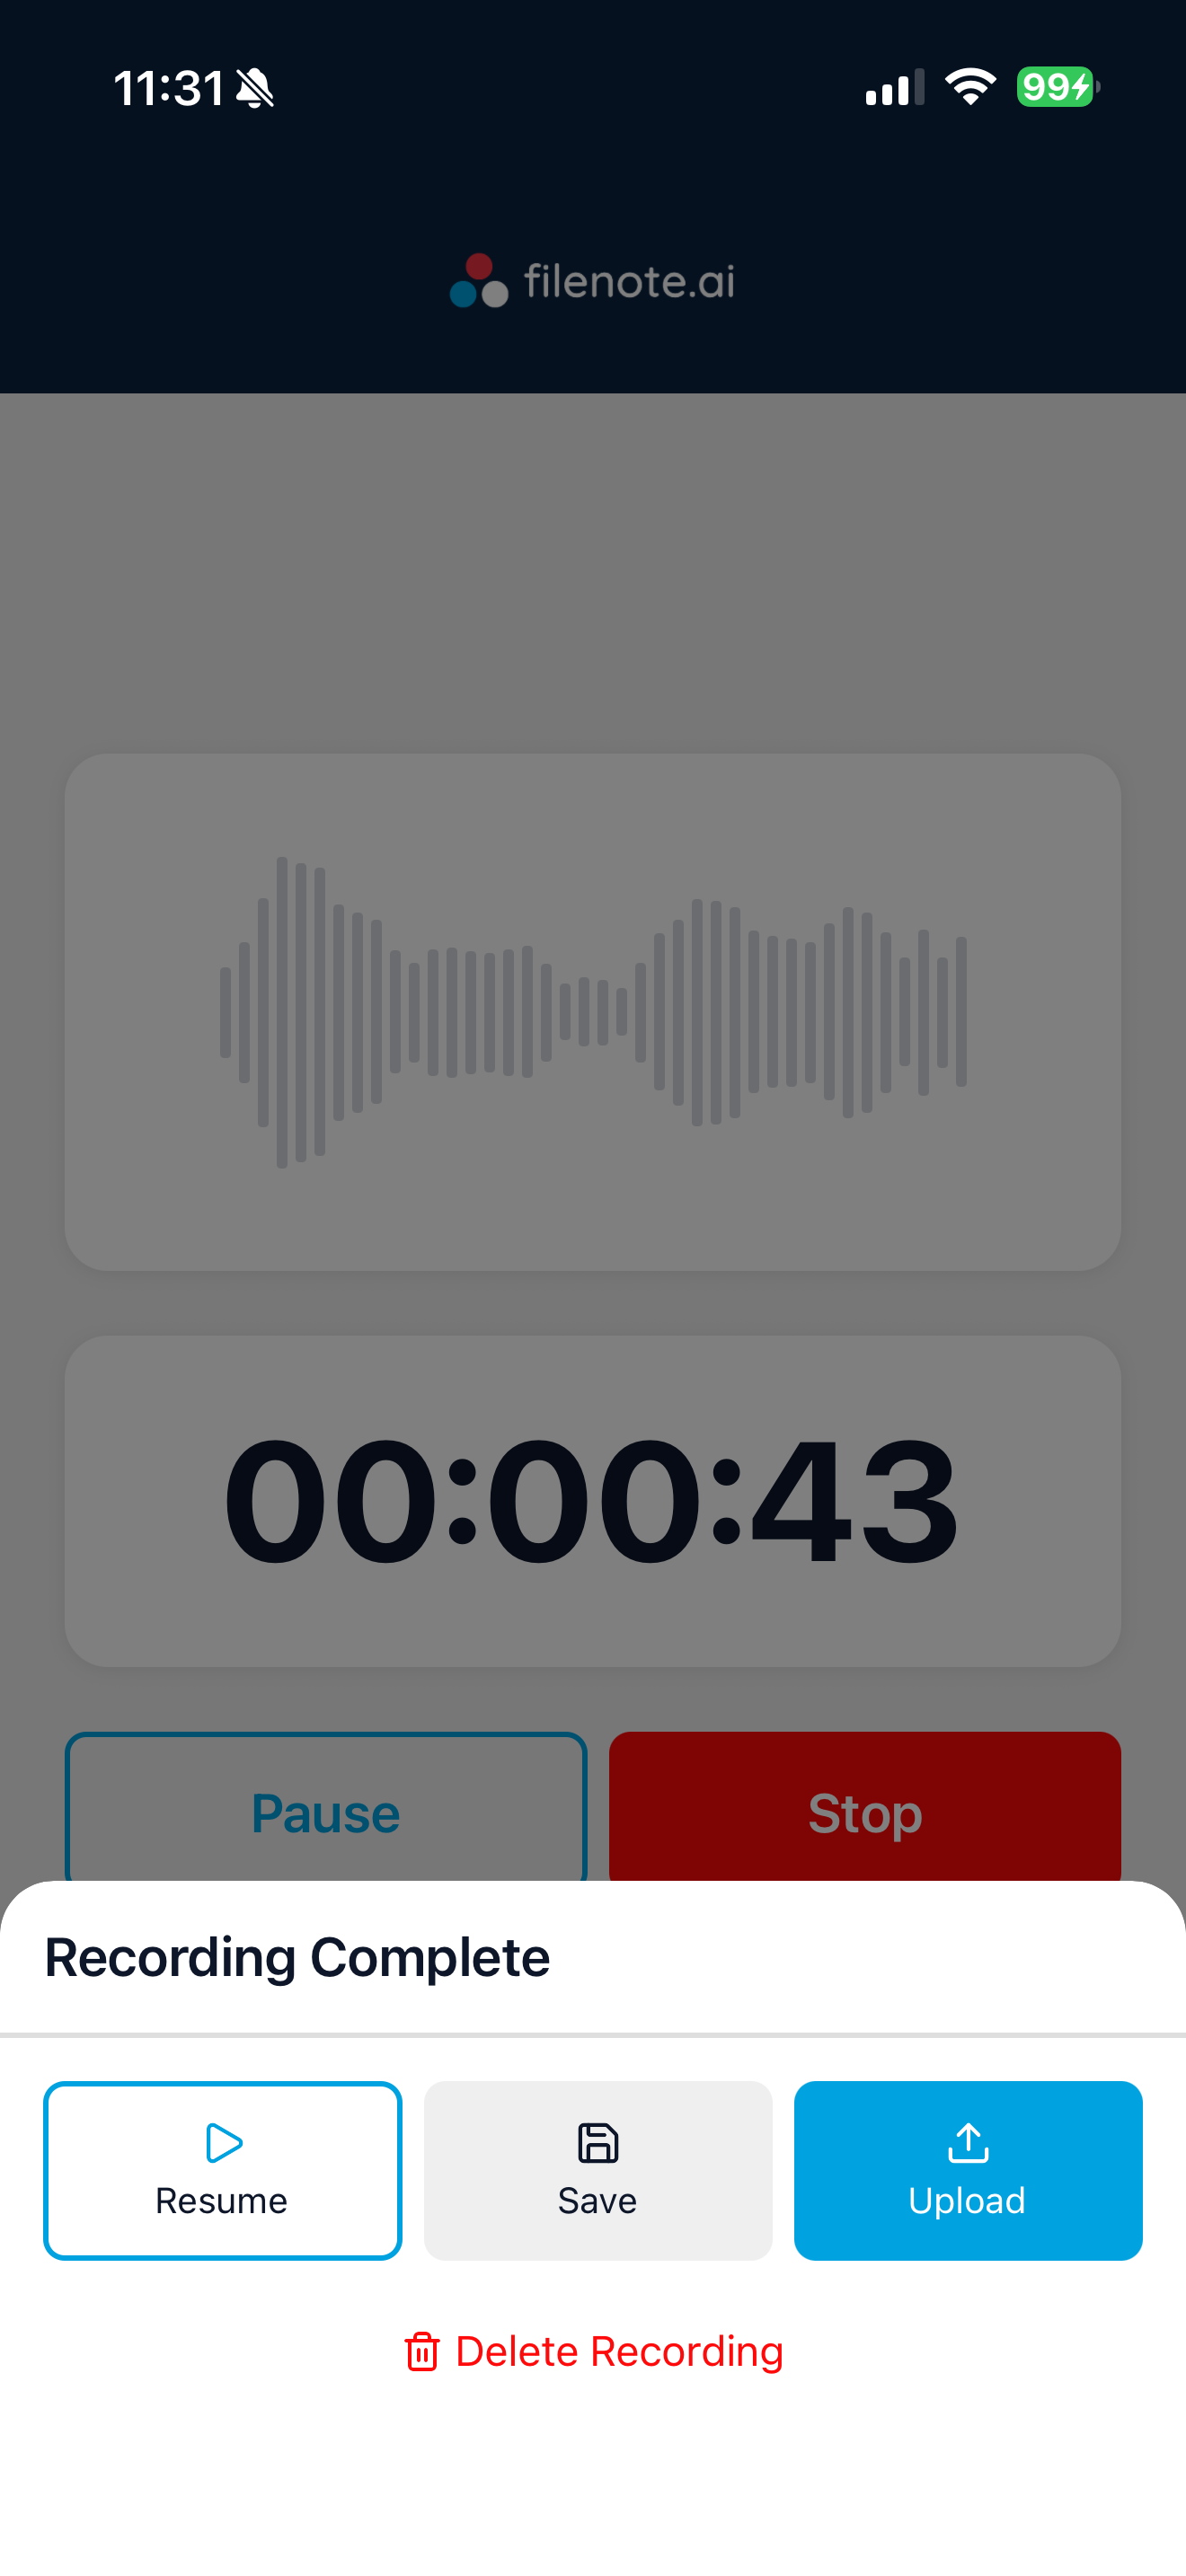
Step 2 — Save and Upload
Once the meeting is done, click Save and Upload.
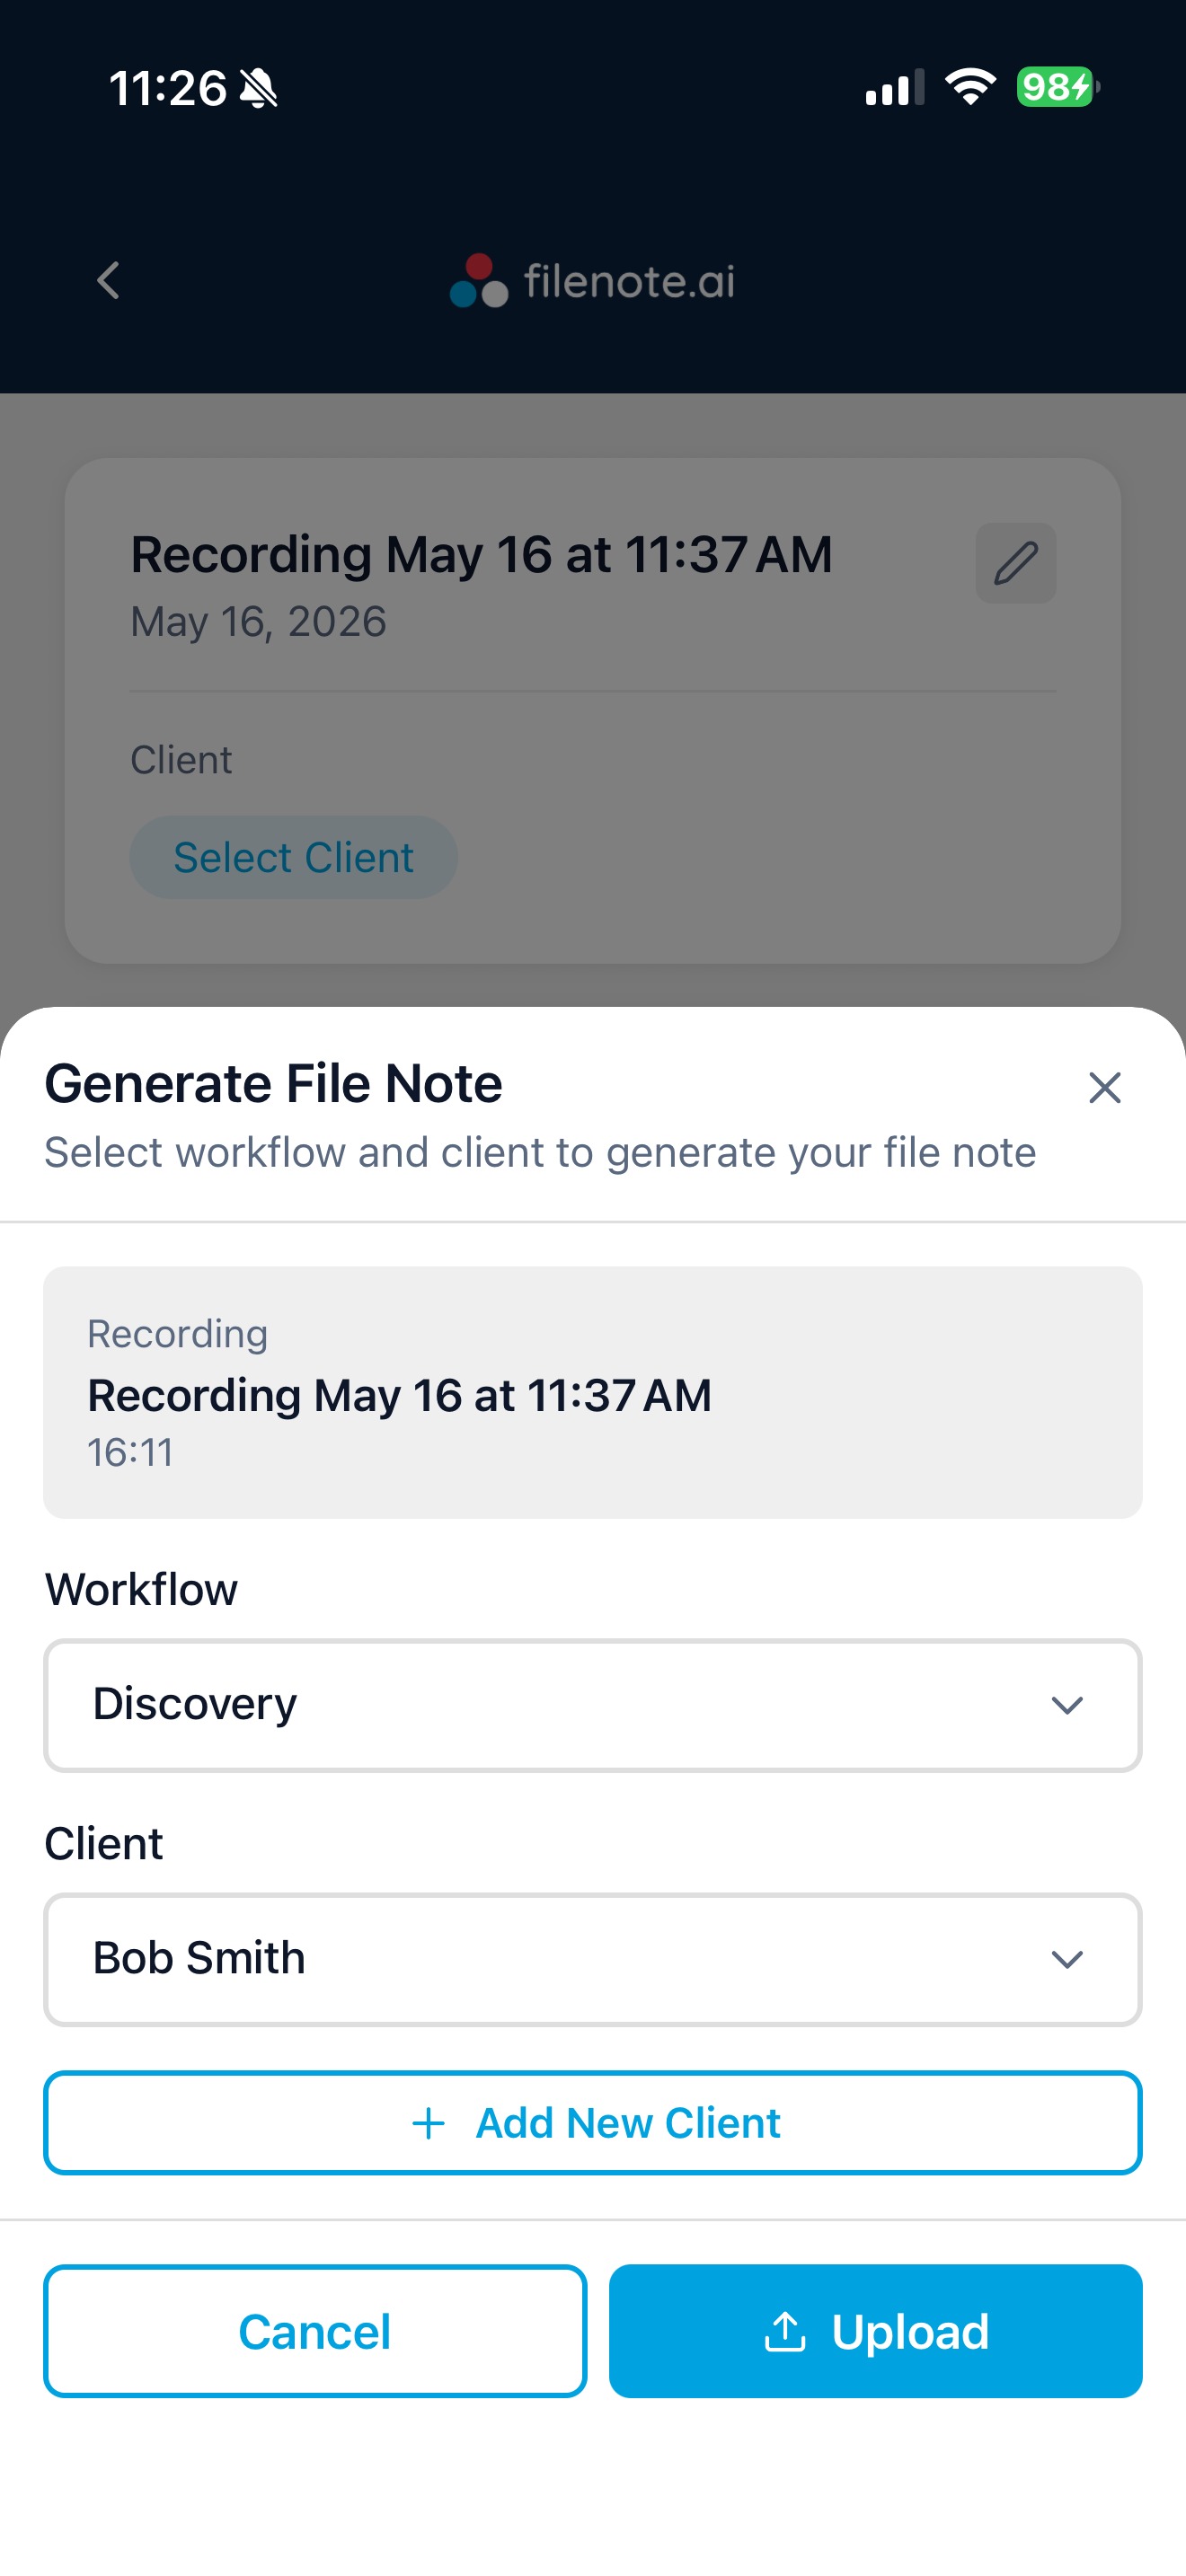
Step 3 — Choose meeting details
Choose your meeting type and add the client's name. This will be processed via Magic Studio and automatically create a new Task for you in the platform Tasks bar containing your file note.
Step 4 — Review & Edit your Output
After you upload, your output will appear as a new task in the Task section on the web platform.
To find your Task:
- Log into platform: app.filenote.ai
- Go to Tasks, find your new task
- Open task, and edit your documents
- When complete, you can:
- Save: saves to our platform
- Download: downloads document
- Finalise: saves to your OneDrive or Sharepoint and marks Task as compl
Looking for more details?
For a complete step by step recording for all supported devices? Check out our Overview: Ways to Record Your Client Meetings.
Related Articles
- Record Online Meeting via Microsoft Teams App on Desktop
- Record Online Meetings via Zoom on Desktop
- How to Use the Filenote AI App (iPhone)
- Review, Edit and Finalise your Outputs
- Customise Workflows
| Need help? If you run into any issues or have questions, our support team is here to help. Email Support → |
Was this article helpful?
That’s Great!
Thank you for your feedback
Sorry! We couldn't be helpful
Thank you for your feedback
Feedback sent
We appreciate your effort and will try to fix the article